Search This Blog

Wednesday 7 September 2016

Styling and stuff

Hey everyone,

Sorry I haven't posted in a while I was enjoying a well-earned holiday! I'm now back with a post I hope you'll love just as much as I did preparing it. So below I have styled outfits for a night out, I did my own hair and my make up and photography credits go to my awesome sister Emily Roberts.

Sleek make-up palette- £10
FCUK eye shadow palette
Avon Rose lipstick-£3.99
2True Lip gloss-£1.99


Top- H&M £14.99
Skirt- Handmade by My Mom
Shoes-Primark
Earrings-Unspecified
Ring- Etsy


Dress- Primark
Shoes-Deichmann
Earrings-Craft centre
Bag- Quiz
Ear Cuff- Etsy


Blazer-Bohoo £19.99
Trousers-Topshop £32.00
Shoes-BHS
Ear Cuff- Etsy £7.99
Bag-Miss Selfridge

Thanks for reading,
Jennifer xx

Wednesday 10 August 2016

Costume Exhibition

Heyyy everyone,
Right so this week I had the opportunity to go to a local Costume exhibition, this had a whole host of period costumes from British Television and film sets, held in Worcester Cathedral. At only £6 each it was a bargain, as it featured costumes from T.V and films, such as Downtown Abbey, Mr Selfridge , Poldark, Far from the Maddening Crowd and The Danish Girl. The exhibition runs from 1st to 29th August 2016, Monday to Saturday from 10am - last entry 4pm and Sunday 11am - last entry 3pm.
 It was fascinating to see all the costumes, there are even background stories on the historical figures who the characters were based on. If you get the chance please go see it! 

Here are a few of my favourites from the exhibition.

The Hollow Crown: The War of the Roses Richard III

 Far from the Maddening Crowd

 Downtown Abbey

 The Danish Girl

 Mr Selfridge

Mr Selfridge

Hope you enjoyed reading this post, as always let me know what you think !
Jennifer x

Monday 1 August 2016

Homemade Biscoff spread

Hey everyone,
So you regular readers will know that I have a bit of an obsession with Biscoff Spread. However, at £3 something a jar it's not very affordable, the Biscoff biscuits on the other hand are a lot cheaper and can be bought in bulk. Therefore I had a brainwave and decided, if the biscuits are what's in Biscoff I could try to make my own spread!! After reading the ingredients I decided to give the ingredients I had in my cupboard a whirl and see what it came out like. RESULT, it tastes like actual Biscoff and 10 times better because of the satisfaction of making it yourself. Also this is a 3 ingredient recipe, BONUS!! In this I show the crunchy and smooth variations.

About 50 Biscoff biscuits*
60ml Sunflower oil
4 tbsps of Icing sugar

*reserve some for later if making the crunchy variation

You will need a food processor, preferably with a blender attachment to smooth out all those biscuit lumps.

So here's the mini Biscoff biscuits, so I stuck them in the food processor and processed into a fine crumb.
Slowly mix in half of the sunflower oil, whilst the processor is going through the small opening at the top. You will have a wet crumb mixture, at this point remove from the processor and add 10ml of sunflower oil to a blender then add the biscuit mix.

Add remaining sunflower oil on top of the biscuit mixture and mix until smooth, as seen in the picture on the right.
Transfer the mixture back into the processor and add the icing sugar, process until a smooth paste forms, as shown on the right.
To make a crunchy variation once the paste has formed mix in leftover biscuits until they resemble fine crumbs.
 
This is the finished result which I have transferred into tubs or jars. The normal smooth spread is on the left and the crunchy is on the left. Beware when you first finish them, it will be extremely runny and not yet a paste so follow the final step below for the best results.

ITS BISCOFF !!!
 To get the right texture I recommend setting in the fridge overnight then you get your smooth or crunchy spread, depending on your preference. Or make both like I did !!!

Thanks for reading,
Jennifer x


Sunday 24 July 2016

Short hair styles

Hey everyone,

So I have recently had my hair chopped off! As there's not many tutorials for short hair I thought I'd post one of the styles I do regularly, easy and simple.

Here's how my hair looks after I simply straighten it, I like it a bit messy so I don't straighten every piece just sections.


The next style is a half up and down ponytail I just grab the top section of my hair and tie it back and done !
The next two styles are quite similar, but can look very different once done, I simply twisted a section of hair at the front away from my face and pinned it back with grips, the first one was done with both sides and the second just the one.
Even with short hair you can still plait it beautifully, I just French- plaited both sides of my hair and voila simple but effective! This would work just as well with a Fishtail and a 3 braid.
Lastly I put my hair up by pinning sections up at the back of my head until it's all up!
Thanks for reading,
Jennifer x


Wednesday 13 July 2016

The Shirt

Heyy everyone,

So as promised this week's post will be on the Shirt my friend Emily created for our first Uni module, that I modelled for her. The Shirt she created was based on the concept 'The Future Past', she chose to focus on the 1920's and geometry. To relay her themes in the shirt she chose to have a loose fit with pleating detailing and an oversized collar, as well as the shapes that are the main feature of the shirt. For the actual shoot we chose a white background, as not to distract from the shirt and to emphasise the detailing. An outside setting seemed appropriate as the natural light was good and the grunge style brick wall I'm against fitted in with the 1920's scene of gang culture and Prohibition.
So take a look at what we ended up with below and don't forget to check out Emily's blog too !! http://thetypicalaquarius.blogspot.co.uk/


Trousers: H&M
Shoes: Forever 21

Thanks for reading,
Jennifer x

Thursday 7 July 2016

Capsule packing

Heyyy everyone,
Firstly sorry I haven't posted in a while I went on a short holiday. However I had to pack pretty light, as I was staying in a Caravan, which meant packing clothes that could be styled in different ways for a fresh look. Coincidently that is what inspired this post, which is all about the capsule pieces I took. So enjoy taking a look through, some prices are listed, others aren't as they are older pieces so I'm not sure of an accurate price. Also, I have tried to be as accurate as possible with the prices, but some might be slightly out depending on how long ago I got them.


First I packed a swimming/beach essential. Although I have never personally done it, if it's a nice day you could always pair your bikini top with some shorts, jeans or a skirt for a new look.
Bikini top: £12.99 River Island
Bottoms: £2.00 Primark

 A light weight cardigan for when it get chilly or of an evening, this one is from Jane Norman, however I regret I can't recall the price.

Two summery dresses that can be made warmer by popping the aforementioned cardigan on top or a shirt/rollneck underneath.
Yellow dress: No price, as I made it myself!
Black slip dress: £15.99 ASOS

A summery dress for a nice evening out, or perfect for a picnic. Again this is another of my creations so no price I'm afraid.

 Rollnecks!!These are an absolute essential of mine, perfect for layering and they look so chic on  their own too.
Green rollneck: £14.99 H&M
Grey rollneck: £8.00 Primark


Off the shoulder tops are so in right now, here's mine black to be paired with anything.
 Bardot style top: £15.00 Miss Selfridge

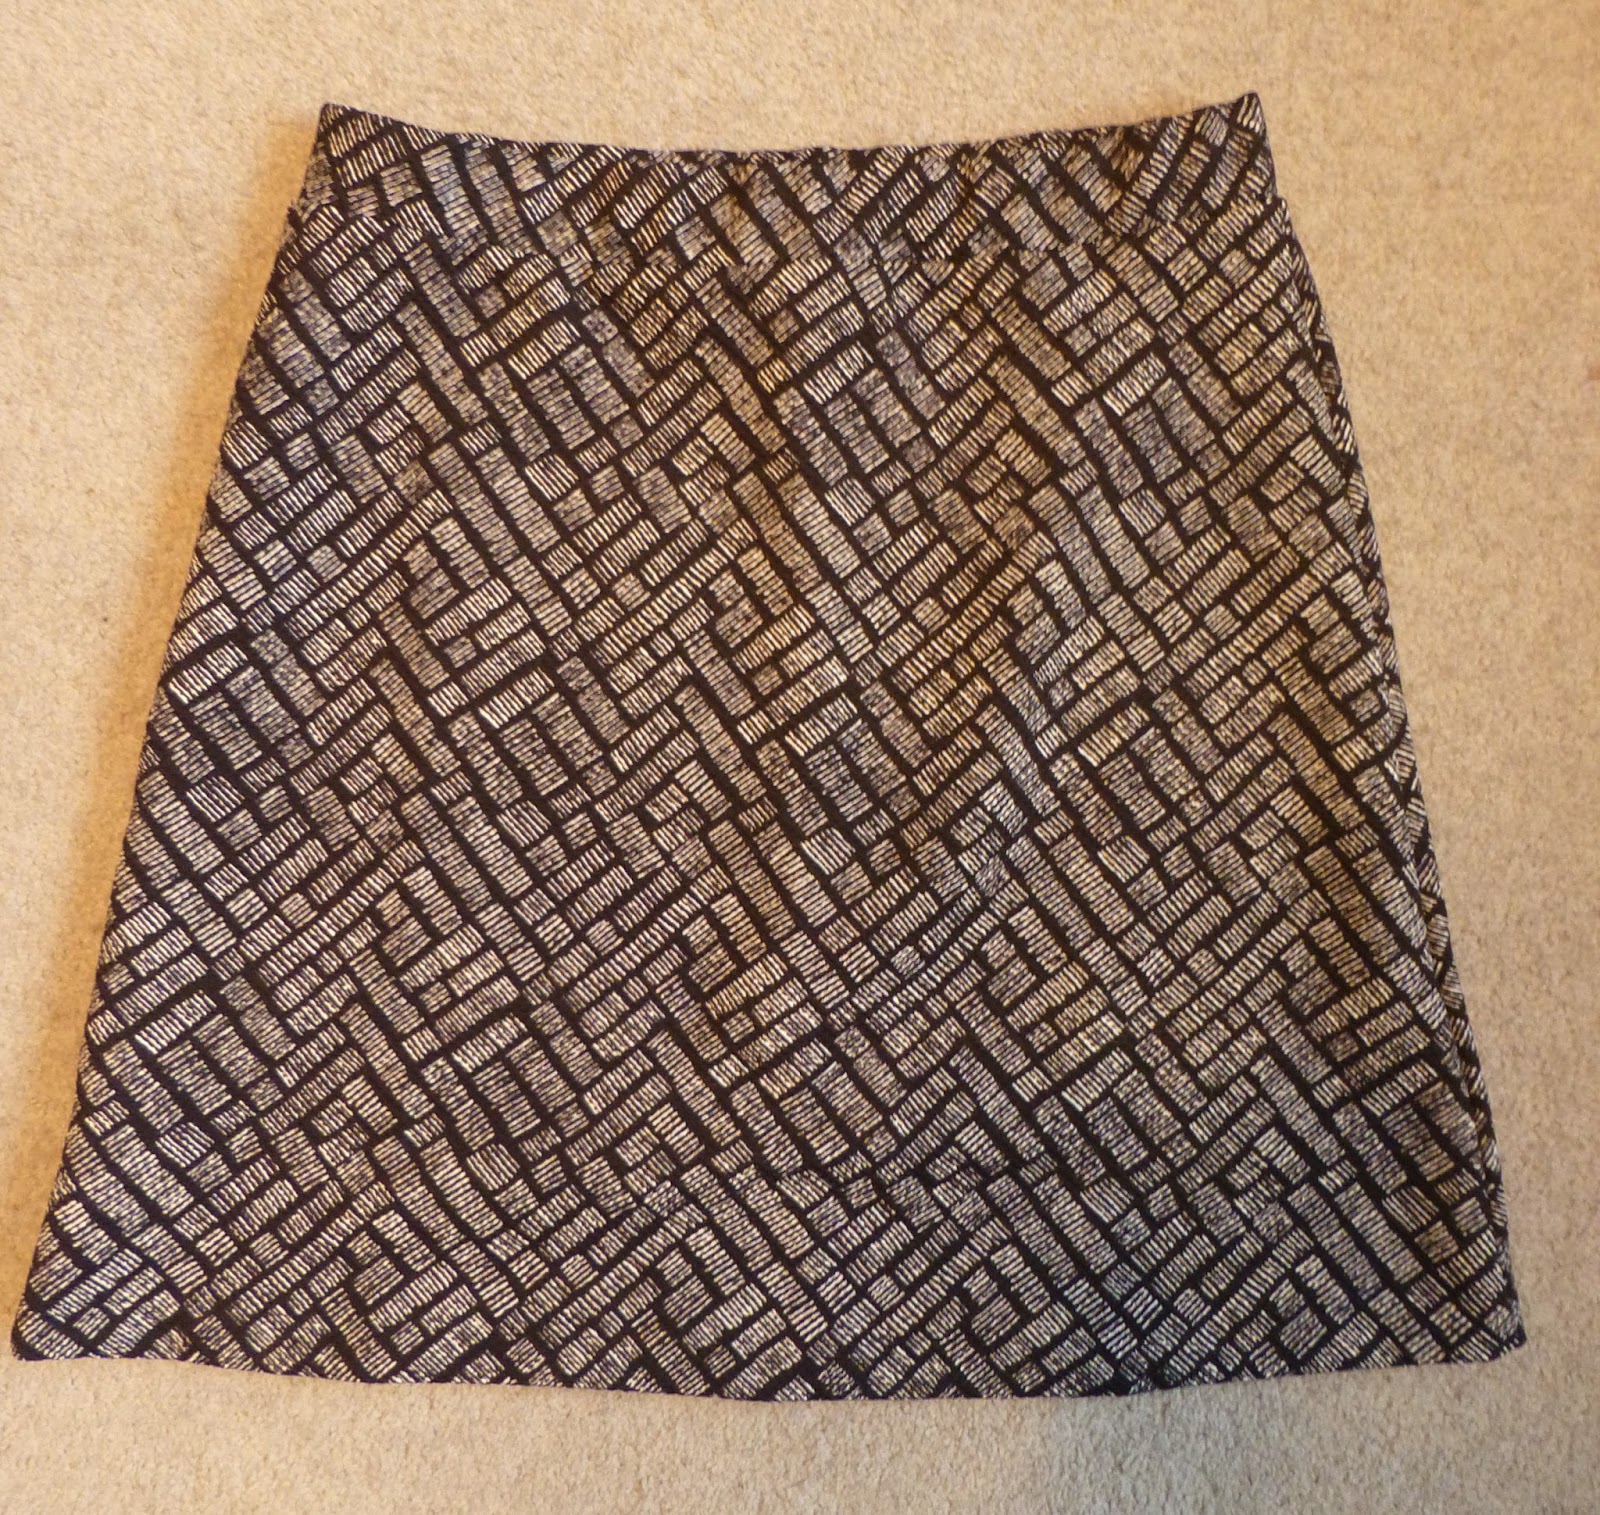
This skirt keeps cropping up in my posts, because it's so versatile it can be easily dressed up or down.
Skirt: £7.99 H&M


Culottes are a great piece, again easily dressed up or down.
Culottes: £12.99 New Look

Lastly I couldn't go anywhere without at least one pair of trusty jeans, I have had these ones for ages so sorry no idea where they were from or how much.

Thanks for reading,
Jennifer x


Wednesday 22 June 2016

Look book modelling

Hey everyone,

As my last look book post got a crazy amount of views, I figured you guys find this type of content interesting. This post features creations from two of my very talented friends, and me as the model. Both dresses are for the same project titled 'Commercial Diffusion', where creative designs were diffused to create a commercial, wearable outcome based upon an existing designers work. In both cases my make up was done by the designer and the hair by myself. The designers also both took the photos themselves.

The dress below was designed and created by Joyce Giron.The design inspired by designer Roland Mouret, who creates sophisticated silhouettes, often with geometric panelling. The colour palette reflects the bright colours used in many of Mouret's collections.

Discover Joyce on Pinterest here:https://uk.pinterest.com/joyceanne_giron/
More about Mouret: https://www.rolandmouret.com/brand/post/biography 


The next dress was designed and created by Emily Richmond. The design was inspired by Erdem, who uses a muted colour palette and lightweight materials. The hand sewn starfish on the cape were created freehand and mimics the fine detailing Erdem uses on his garments.

Discover Emily's blog here:http://thetypicalaquarius.blogspot.co.uk/
More about Erdem:https://erdem.com/about/biography


I recently also modelled a shirt for Emily, which I will do a post on at a later date.

Hope you enjoyed this and make sure to check out my awesome designer friends work!
Thanks for reading,
Jennifer x


Thursday 16 June 2016

Copycat Biscoff Biscuits

Hey everyone,

This is another cooking post, although not as extremely delicious as Biscoff biscuits this copycat recipe curbs the cravings the same way. I adapted a recipe I found online which I have adapted to suit ingredients I had in the house and what I thought would enhance the flavour. Feel free to completely follow the recipe or you can use my adaptation.

Original recipe:http://www.cupcakeproject.com/2010/07/biscoff-cookies-from-scratch-recipe.html

I kept most of the same ingredients but adapted a little bit.
My ingredients:
  • 2 Cups of plain flour
  • 2 tsp ground cinnamon
  • 1/4 tsp ground nutmeg
  • 1/2 tsp ground ginger
  • 1/2 tsp salt
  • 1/4 tsp baking soda
  • 1/4 tsp baking powder
  • 1 Cup of  unsalted butter, room temperature
  • 1/4 Cup of granulated sugar 
  • 1/4 Cup of molasses 
  • 1/4 Cup of dark brown sugar 
  • 3 tbsp of ground nut oil
  • 1 tsp vanilla extract
 So as I already know how to make cookies I pretty much free styled the instructions, but I will post what I did regardless as not everyone cooks as much as me.

 
Instructions:
  • Preheat the oven to 350F/ gas 4.
  • In a bowl, whisk together all of the dry ingredients.
  • In a separate bowl, cream together the butter, sugars, oil and vanilla extract with an electric whisk on low speed.
  • Gradually add the flour mixture into the butter mixture, whisking on a low speed until it is well combined. 
  •  Line two baking sheets and scoop a tablespoon of mixture at a time so the cookies are evenly spaced.
  • Place in the oven and bake for 20 minutes, leave to cool for 10 minutes then you can munch away !! 


Thanks for reading,
Jennifer x